Bobby Paulshock (@b.pshock): Best of the week 8 at #nomadict 2026
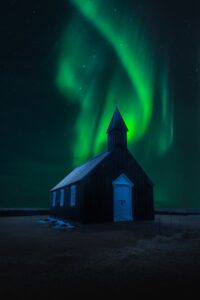
In this article, Bobby Paulshock shares how a wife, a dog, and a solo 1 AM hike in a 90-mph Icelandic storm shaped his path from iPhone snapshots to his award-winning aurora shot at Búðakirkja, plus four hard-earned lessons on gear, patience, and building a career from passion.